Invoice Attachments
The Invoice Attachments step is the second step in the invoice creation process.
This step is optional.

Upload Document
To attach a document to the invoice, click the Browse button.
Navigate to the local or network location of the document to be attached.
Click the document to select it, click Open.
The selected document name appears in the Attachment field.
Use the Purpose field to enter a description of the attachment or a reason for the attachment.
Click Next to proceed to the final step in the invoice creation process, Summary.
Add More Attachments
To add more than one document to the invoice, click the Add More button.
The page will refresh to include a new Attachment field and Purpose text box.

Repeat the steps to search for and select a document to be added.
Add a Purpose, if desired, for the additional attachment.
Repeat the add more attachments steps for each document to be added.
Click Next to proceed to the final step in the invoice creation process, Summary.
Remove Attachment
Once an attachment has been added and saved, a new Delete  icon will be visible above the hyper linked attachment name.
Click the Delete icon to remove an attachment. The
following confirmation message will display:

Click OK to proceed with the deletion of the attachment.
The page will refresh and the deleted attachment will no longer be displayed on the Invoice Attachments page.
Cancel ends the deletion process; the attachment remains intact.
Discard Draft
If you wish to discard your invoice while creating it, simply click Discard Draft.
The following confirmation message will display:
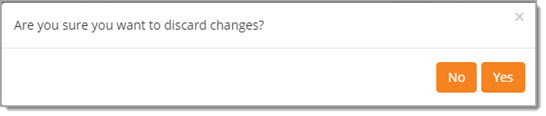
Click Yes to proceed with discarding the invoice.
No closes the message and returns you to the invoice.
