P-Cards
IMPORTANT: Organizations decide whether or not to enable P-Cards. The P-Cards menu option is only visible if this functionality has been enabled for your organization by an internal Proactis Administrator.
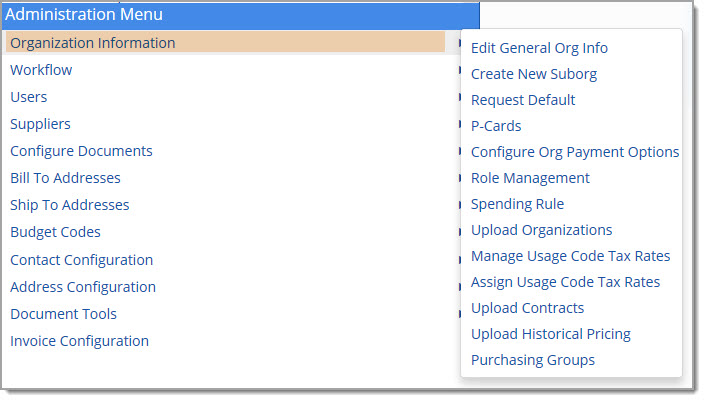
Select the P-Cards option from the Organization Information menu under Administration in order to enter or manage P-Card information that may be used when paying for goods and services through WebProcure.
The User P-Card Information page opens:

By default, a listing of all the user and organization entered P-Cards are displayed.
The following information is identified per card:
-
Sequence Number - Order in which card was entered into the system.
-
Name on Card
-
Payment Type - Type of P-Card, such as Visa, MasterCard, American Express, etc.
-
Payment Type Description
-
Corporate Card - Designation of whether or not P-Card is a Corporate Card (true) or not (false).
-
Priority - The priority assignment of P-Cards is managed on the Configure Payment Types page. This page displays the P-Card priority as it currently exists.
NOTE: The card that is designated as Priority zero (0), is the default card for all purchases. All other P-Cards will be available for selection from a drop-down men. The payment list is available in the Orders module. (Create New Request)
Actions
The Actions column contains two icons for each P-Card.
Edit
Select the Edit  icon from the Actions column. The P-Card Information opens:

The system masks the complete P-Card Number, Name on Card, and Expiration Date.
To edit these specific fields, select the Edit icon in
each field respectively. The system intentionally clears the entire P-Card Number; the entire P-Card Number will need to be re-entered. This behavior also applies to
the Name on Card and Expiration Date fields.
The Currency Card Nickname, Description, and Bill to Address are not masked and may be edited as needed. Each field is discussed in the New P-Card topic below.
Save to maintain changes.
Cancel discards edits and returns to the P-Card Information page.
Delete
To remove a P-Card from the list of P-Cards, click the Delete  icon. The following confirmation message displays:

Click OK to proceed with deletion.
Cancel ends the deletion process; P-Card remains intact.
New P-Card
From the P-Card Info page, click New P-Card.

-
P-Card Number - As you begin entering the credit card number, the image of the card on this page updates dynamically; changing color and logo depending on the credit card details being entered. Validation is performed on the entered P-Card Number to ensure numbers are entered accurately. The check mark will turn green
 to indicate the number passed validation.
 -
Name on Card - Enter the name exactly as it appears on the card.
-
Expiration Date - Enter the month and year of expiration for the card. The format is MM/YYYY.
Two-digit month and four digit year.
Validation is performed on the entered Expiration Date to ensure the date is entered accurately.
The check mark will turn green to indicate the date passed validation. -
Currency - Use the drop-down menu to select the default currency of the P-Card.
-
Card Nickname - Enter a unique name for the entered P-Card.
The Nickname will be on the Purchase Order that is dispatched to the vendor, allowing the vendor to identify the P-Card that is being used for payment.
This field only accepts alpha characters; numbers and special characters are prohibited. -
Corporate Card - The default setting is No. Change this setting to Yes if the newly entered P-Card is a corporate card versus a personal card.
As a result of this selected setting, the radio button in the lower right corner for Select User and Select Borg will update automatically. -
-
If the setting of Corporate Card is No, the radio button will indicate Select User.
-
If the setting of Corporate Card is Yes, the radio button will indicate Select Borg.
-
Conversely, changing the Select User or Select Borg radio buttons will update the Corporate Card setting accordingly.
-
Description - A Description is required as the information is included on the Purchase Order when it is dispatched to the vendor. Users are encouraged to enter the appropriate level of detail that will enable the vendors to correctly identify the P-Card. This field accepts up to 1000 alphanumeric characters maximum.
-
Bill to Address - This field is required. This field contains type-ahead functionality. As you enter text, the system retrieves matching billing addresses. Two asterisks (**) may be entered to view a complete listing of available billing addresses. Click to highlight the desired billing address. Once an address has been selected, you may click the notepad
 icon to view the complete address and verify the correct address was selected.

-
Select User / Select Borg - This setting will change based on the Corporate Card designation.
-
-
Pick the Select User radio button to designate the newly entered P-Card as a personal card and proceed with identifying the user in the system that the P-Card belongs to. If the setting of Corporate Card is No, the radio button will indicate Select User.
-
Pick the Select Borg radio button to designate the newly entered P-Card as a Corporate Card and proceed with identifying the organization that the P-Card belongs to. If the setting of Corporate Card is Yes, the radio button will indicate Select Borg.
-
Conversely, if the Corporate Card toggle is changed, the Select User or Select Borg setting will update accordingly.
Select User
If the Corporate Card designation is set as No, the Select User radio button will be selected by default.
Begin typing into the text box. This field contains type-ahead functionality. As you enter text, the system will retrieve system users that match.

Select the user from the list of available users.
To view a complete listing of available users, enter two asterisks (**).
Select Organization
If the Corporate Card designation is set as Yes, the Select Borg radio button will be selected by default.
Begin typing into the text box. This field contains type-ahead functionality.
As you enter text, the system will retrieve organizations that match.

Select the organization from the list of available organizations.
To view a complete listing of available users, enter two asterisks (**).
Be sure to Save the newly created card.
A successfully saved confirmation message will display briefly in the upper right corner.

Cancel closes the New P-Card page without saving the entered information.