Central Receiving
Central Receiving is a dual-phased process that allows items to be initially received at the store /warehouse, where an authorized central receiver performs quantitative checks. Next, the pending receipt is completed by the requester, who verifies shipment quality.
Requirements
The central receiving process will only activate when:
-
A Store ID / Warehouse Code is on the Ship To Address.
-
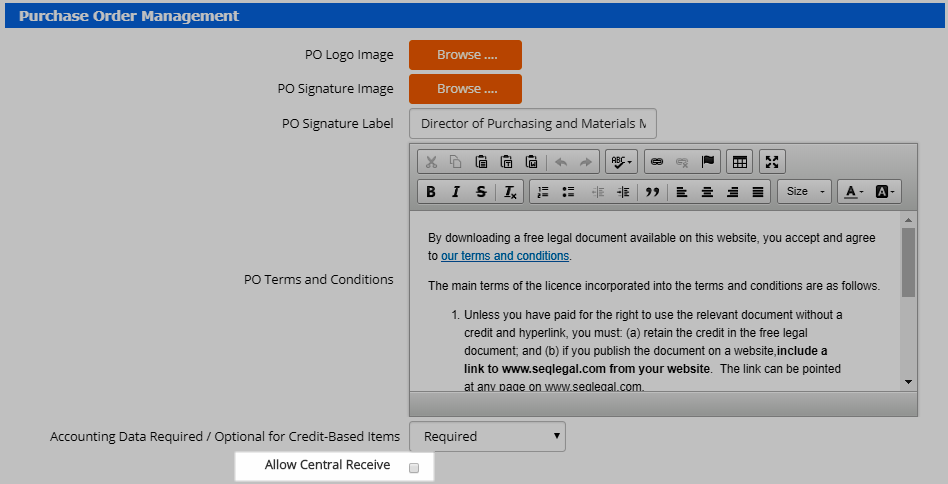
The Allow Central Receiving setting is enabled from the Purchase Order Management area of the Admin module.
Note: This setting is not enabled by default and does not inherit.
-
Central receivers are assigned the new Order-Central Receiving privilege from their respective Role Management pages. Central receivers should not have other receipt privileges.

Initial Reception
To begin the first phase of central reception, access the Receiving List from the Orders menu.
After performing a filtered search to locate the order, select Receive ![]() from the Actions
from the Actions ![]() menu.
menu.
The Receipt Entry page opens.
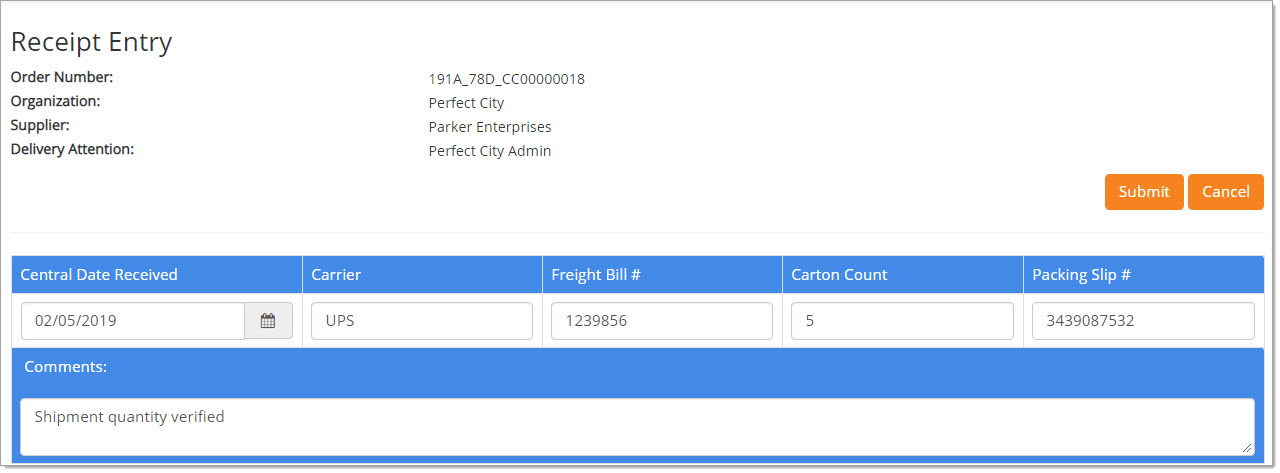
The Purchase Order Number, the user’s Organization, the Supplier name and the Delivery Attention contact are displayed at the top of the page.
Cancel discards entered data and returns to Receiving List page.
Receive
The top portion of the page is the receipt header information. Complete the fields as applicable:
-
Central Date Received - Enter the date using mm/dd/yyyy format or click the Calendar
 icon
to select the date that the items were initially received at store/warehouse.
 -
Carrier - Enter the name of the carrier used for shipment. For example, USPS, UPS, DHL, FedEx, etc. Carrier names may need to be truncated to accommodate the field length of 50 alpha numeric characters.
-
Freight bill # - Enter a freight billing number, if applicable. This field accepts up to 50 alpha numeric characters.
-
Carton Count - Identify how many individual packages arrived in the shipment. This field accepts up to 12 numeric characters.
-
Packing Slip # - Enter a packing slip number, if applicable. This field accepts up to 50 alpha numeric characters.
-
Comments - The comments field may be used to enter information relating to the items/shipment received. This field accepts up to 255 alpha numeric characters.
The middle portion of the page lists the individual line items as they appeared on the purchase order.

The following information is available for each line item:
-
Quantity Ordered - Displays the quantity of the item as specified on the purchase order.
-
Received to Date Quantity - No receipts have already been entered for a line item, so the received quantity will display a zero.
-
Packing Slip Quantity - Enter the quantity for this line item that is stated on packing list, if one exists.
-
Item Description - The description of the line item as it exists on the purchase order.
-
Supplier Part Number - The supplier's part number for this line item as it exists on the purchase order.
The bottom of portion of the page allows attachments to be uploaded, such as a digital packing slip.
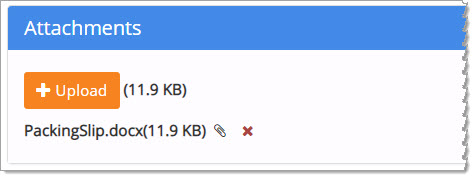
Click the Upload button on the Attachments section, then navigate to the saved location of your file to select.
Once uploaded, attached files have a Paperclip ![]() icon to the right of the file name. To delete the attached file, select the
red X.
icon to the right of the file name. To delete the attached file, select the
red X.
To upload additional files, repeat the process.
Once the receipts have been entered, click Submit. A confirmation message will display:

Email Notification
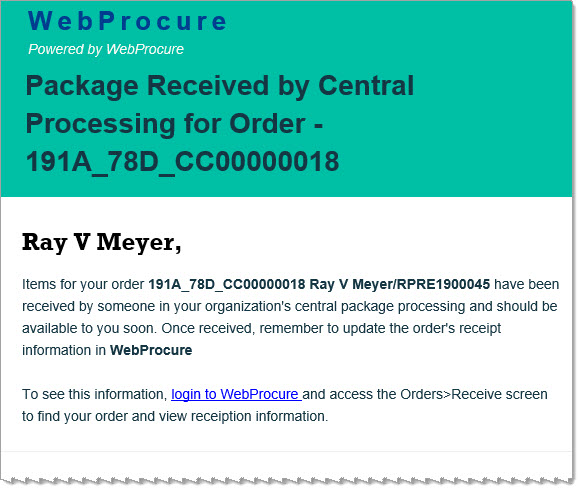
After the receipt has been submitted, an automatically generated email is sent to the requester, alerting them that items from an order have been centrally received and should be available soon. Once the items are in the requester's possession, the receiving process needs to be completed.
Completing the Receipt
To finalize the central reception process, the original requester must log in and access the Receiving List from the Orders menu.
After performing a filtered search to locate the order, select the Actions ![]() menu to display options.
menu to display options.
-
View Receipt History
 - Displays data
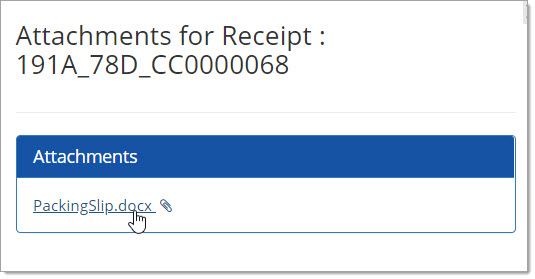
entered by central receiver. In the Attachments for Receipt section, files may be viewed and saved by selecting the hyperlink.
-
Receive
 - Select to open the Receipt Entry page.
NOTE that the Document Status at this point is Pending Confirmation.
Select View Receipt History to view/verify entries made by central receiver.
Then access Receive from the Actions menu on that page.

Receive All
On the Receipt Entry page, Select Receive All to automatically generate Received Quantities that match and fulfill the Quantity Ordered for each item, taking into account the Received to Date Quantity. This function allows the user to complete receiving against each item on the purchase order.
Receive
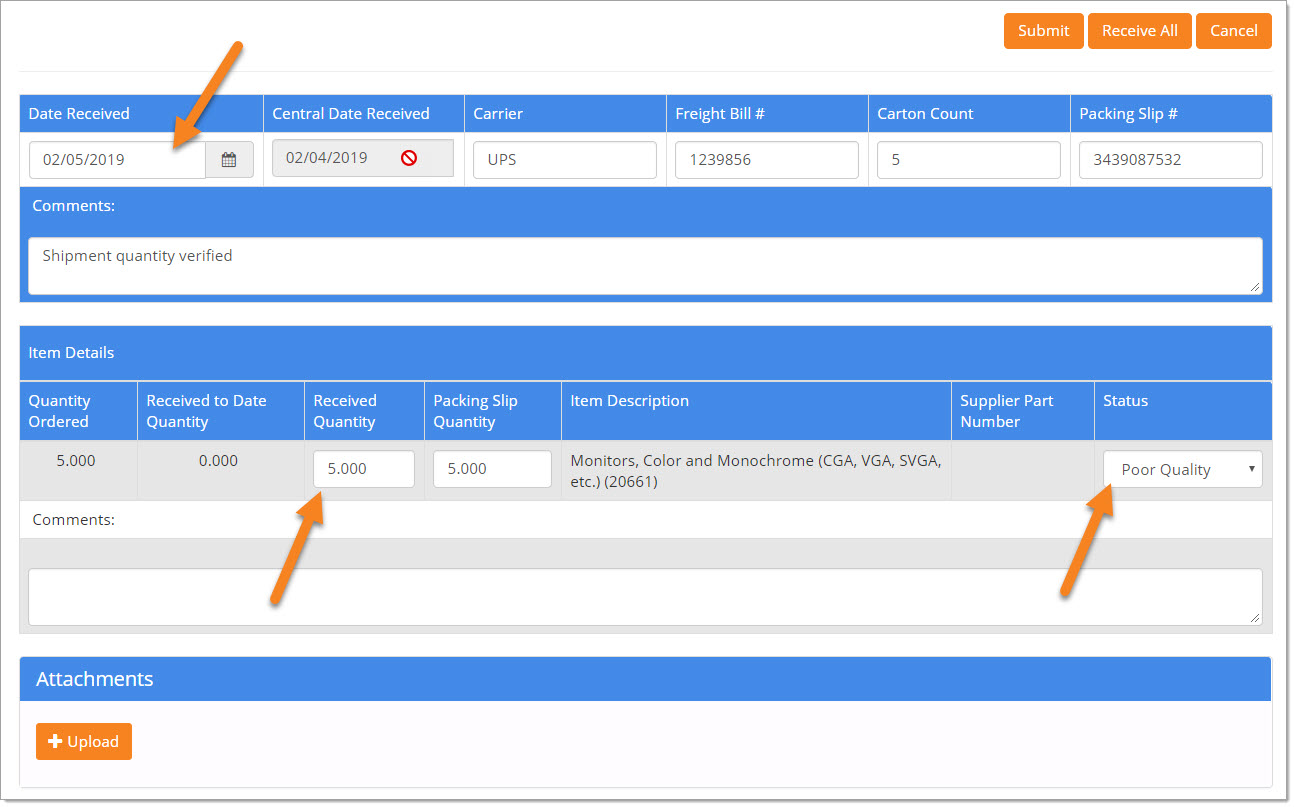
Complete the following fields to complete the process.
-
Date Received - Enter the date using mm/dd/yyyy format or click the Calendar
 icon
to select the date that the items were received.
 -
Received Quantity- Enter the amount for this line item that was received in this shipment. If the Receive All button was selected, this field will be pre-populated with the same amount as was ordered.
-
Status - Use the drop-down menu to acknowledge the state of the goods received.
NOTE: You may edit values entered by central receiver as needed, with the exception of Central Date Received, which is a read-only field.
Submit receipt.
On the Receiving List page, the Receipt Status will now be identified as Complete. The Receipt History for the transaction will display final entered values and attachments. The requester, not the central receiver, will be listed in the Received By column.
