Create Invitation
NOTE: Please be advised that users must have the Create Vendor Request Module permission to create Vendor Invitations. The options relating to Vendor Invitations will only be visible if your organization has these features enabled.
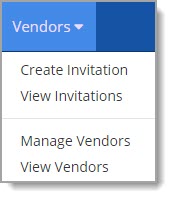
Choose Create Invitation from the Vendors drop-down menu to begin the process of creating an invitation.

The wizard opens to the Create Invitation page.

Vendor Information
The first step in the vendor invitation creation process is entering in the Vendor Information.
Fields marked with an asterisk (*) are required or conditionally required.
Complete this page as follows:
-
Vendor Name* - Enter the full name of the vendor organization.
This field is required. -
Country* - Use the drop-down menu to select the country of the vendor organization.
The default selection is United States.
Also, if the Country designation is United States, a FEIN or SSN will be required. -
Contact First Name* - Enter the first name of the primary contact at the vendor organization.
This field is required. -
Last Name* - Enter the last name of the primary contact at the vendor organization.
This field is required. -
Please Select FEIN or SSN - Use the toggle to designate the type of tax identifier for the vendor.
SSN, Social Security Number, is used for sole proprietors. FEIN, Federal Employer Identification Numbers are used for business entities. The default selection is FEIN.
Be advised that your selection here determines whether Federal Employer Identification Number fields or Social Security Number fields are required. -
Contact Email Address - Enter the complete email address for the primary contact at the vendor organization.
-
Federal Employment Identification Number* and Confirm Federal Employment Identification Number*
or
-
Social Security Number* and Confirm Social Security Number*
-
-
If the selected option to the Please Select FEIN or SSN option was FEIN, then both FEIN fields will be required.
Enter the complete FEIN number in this field and enter it again in the Confirm Federal Employment Identification Number field. The numbers entered in each of the FEIN fields must match.
Also, if the Country designation is United States, a FEIN or SSN will be required. -
If the selected option to the Please Select FEIN or SSN option was SSN, then both SSN fields will be required.
Enter the complete SSN number in this field and enter it again in the Confirm Social Security Number field.
The numbers entered in each of the SSN fields must match. Also, if the Country designation is United States, a FEIN or SSN will be required.
-
-
Vendor Type* - Use the drop-down menu to designate the Vendor Type of this organization.
The values in this drop-down menu will vary based on your organization.
This selection is required. -
Invitation Purpose* - Please enter the reason or purpose for the invitation.
This text box will accept up to 500 alphanumeric characters.
This field is required.
Click Next to proceed to second step in the invitation creation process.
Reset clears all entered data without saving.
Vendor Search
After completing the Vendor Information page and selecting Next, the Vendor Search begins.

The system will search for available vendors matching the entered Vendor Information.

IMPORTANT: If you locate your vendor in the search results and do not wish to proceed with this request, click Close.
More than 50 Vendors
If more than 50 vendors are displayed in the results, the system will display the following confirmation message:
More than 50+ vendors matched with your invitation. Are you sure you still wish to proceed with this invitation?
To return to the Vendor Information page, click Go Back.
To proceed with the invitation creation, click Yes, Proceed.
Search Results
Let's take a closer look at the available vendor search results:

Each vendor record includes the following information:
-
Vendor Name - The name of the vendor that matched or is similar to the entered Vendor Information.
-
Location - The primary address of the listed vendor.
-
Match By - The reason the vendor organization is displayed in terms of how it was matched to the entered Vendor Information.
In the above sample image, you can see the match was based on the Name of the vendor organization. -
Status - The Status of the vendor as it relates to the buying organization.
Actions
Click the ellipsis  to access available actions. These actions will vary based on the Status.
|
Option |
Icon |
Resulting Action |
|
Add Vendor |
|
Select the Add Vendor icon to create and send the invitation to the selected vendor. See Add Vendor sub-topic for more information. |
|
View Profile |
|
Select the View Profile icon to view the supplier profile. See View Profile sub-topic for more information. |
Add Vendor
For those vendors that are not already approved, you will have the option to Add Vendor  from
the Actions column.
from
the Actions column.
If you selected the Add Vendor icon from the Actions column, the following confirmation message will display:

Select Yes to proceed with creating an invitation for this chosen vendor.
Select No if you do not wish to proceed with creating an invitation for the chosen vendor.
If you select Yes, the Create Invitation window displays.

This window displays the selected Vendor Type and the invitation purpose you entered.
Change the Vendor Type, if needed.
Change the invitation purpose, if needed.
Click Submit to submit the invitation into the workflow.
Cancel returns you to the Vendor Search page without submitting the invitation.
View Profile
Select the View Profile  icon from the
Action column or click the active hyper-linked Vendor Name to open the Supplier Information modal window.
icon from the
Action column or click the active hyper-linked Vendor Name to open the Supplier Information modal window.

Submit
If you select Yes, the Create Invitation window displays.
This window displays the selected Vendor Type and the invitation purpose you entered.
Change the Vendor Type, if needed.
Change the invitation purpose, if needed.
Cancel returns you to the Vendor Search page without submitting the invitation.
Click Submit to submit the invitation into the workflow.
The following advisory message displays:

Click OK to acknowledge message.
You will remain on the Vendor Search page and will be able to repeat the Add Vendor and
Submit steps for each vendor to be added.
To exit the invitation creation page, click Close at the bottom of the Vendor Search page.
You will be returned to the Vendor Invitations listing.