Create Personal Ad-Hoc View / Report
Starting point: Analytics > Create Report
NOTE: The available Jasper Views (starting ad-hoc views) will depend on your Role Privileges.

Click the blue folder ![]() of the view that you wish to use as your baseline/starting view.
of the view that you wish to use as your baseline/starting view.
The selected folder icon will change to orange  and display two storage locations: Organization View and Personal View.

The right pane displays the starting view link.
Using both of the above and below images as an example, the Account Controls View is displayed.

Click the hyperlinked Base View Name and begin building your report based on the selected view.
The process of adding Fields and Measures to the report is the same and is discussed in detail in the standard Create Report topic.
Saving Personal Ad-Hoc View
After you have completed building your view, select Save Ad Hoc View As... option from the Save  menu.
menu.
Notice that, as this is the first time the view is being saved, that the Save Ad hoc View As... option is the only option available.

The Save As modal window opens.

Enter a Data View Name. This field is required.
Enter a Data View Description to provide information about this view. This field is optional.
By default, the folder, which is the same name as the view name, is highlighted.
Click the highlighted folder name to expand.
Using the example image below, the only folder that is accessible is my Personal Report folder.

Click the highlighted folder name to expand.
Select the [your name] sub-folder within the Personal Report folder
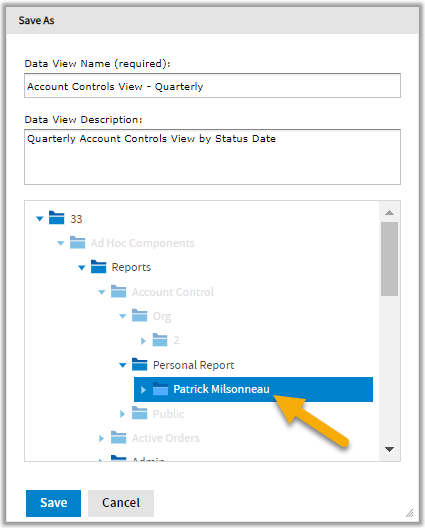
Click Save.
A confirmation message will display in a yellow banner at the top of the page.

Click close to acknowledge successful save message.
To exit out of your saved view, choose Analytics > Create Report from the tool bar.
Visit the related topics: