View Invitations
NOTE: Please be advised that users must have the View Vendor Request Module permission to view Vendor Invitations. The options relating to Vendor Invitations will only be visible if your organization has these features enabled.
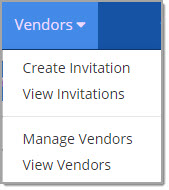
Choose View Invitations from the Vendors drop-down menu to view existing invitations.
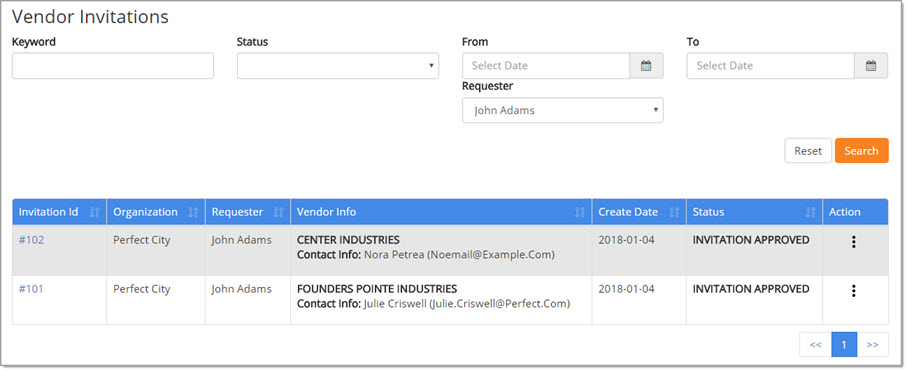
The Vendor Invitations page opens.
Search Invitations
The top portion of the page allow you to refine the listing of displayed invitations, based on one or more of the following filters:
-
Vendor - Enter a full or partial Vendor name to retrieve only those invitations that are related to a particular Vendor.
-
Status - Use the drop-down menu to select an invitation Status and display only those invitations that match the chosen status. Options include:
-
-
Draft - An invitation that has been created but not yet submitted to the approval workflow.
-
Invitation Awaiting Approval - The invitation is in the approval workflow and must be approved before it will be sent.
-
Invitation Approved - The invitation has been approved.
-
Invitation Rejected - The invitation was rejected during the workflow process.
-
Invitation Sent - The invitation has been sent to the vendor.
-
Supplier Awaiting Approval - Vendor's status is waiting to be approved.
-
Supplier Rejected - Vendor has been rejected.
-
Supplier Approved - Vendor has been approved.
-
Draft Revision - An invitation that has been modified but not yet submitted to the approval workflow.
-
-
From and To - Use a date range to display only those invitations created during a particular time frame.
Select the calendar icon to open the date selector:
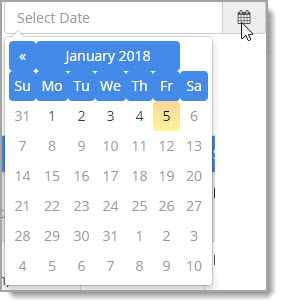
Choose the month and date for the From starting date and a month and date for the To ending date.
-
Requester - By default, this field will be populated with your name. Use the drop-down menu to choose an alternate requester or select All to display invitations from any user.
After filters are selected, click Search.
Reset clears all entered or selected filters.
Search Results
The displayed search results are, by default, sorted primarily by Vendor Info in alphabetic order.
![]()
Column headings that contain the double arrows  indicate that the table may be sorted by that column in ascending or descending order.
Simply click the column heading to choose the column as the primary sort and then again to toggle between ascending and descending order.
Each invitation record includes the following information:
-
Invitation ID
-
Organization
-
Requester
-
Vendor Info
-
Create Date
-
Status
Action
Click the ellipsis  to access available actions. These actions will vary based
on the Status.
|
Option |
Icon |
Resulting Action |
|
Edit Invitation |
|
Select this icon to open an invitation for editing. |
|
Invitation Workflow |
|
Select this icon to view the approval workflow map. |
|
View Invitation |
|
Select this icon to view the invitation details. |
|
Resend Invitation |
|
Select this icon to resend an invitation to the vendor.
|
Edit Invitation
Select the Edit Invitation ![]() icon to open an invitation for editing.
icon to open an invitation for editing.
REMEMBER: Invitation status must be Draft , Invitation Awaiting Approval, or Invitation Sent .
The invitation opens to the Summary page.
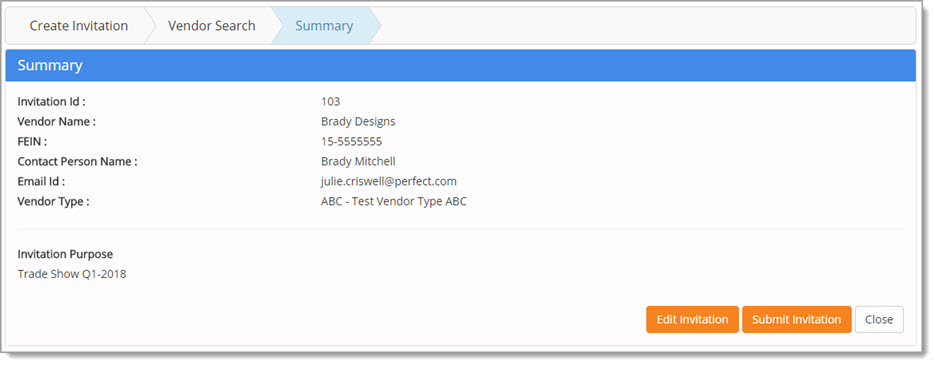
The options on this page include:
-
Edit Invitation - Opens the invitation in full edit mode.
-
Submit Invitation - If the invitation is accurate and ready to be submitted as is.
-
Close - Select this option to close the invitation and return to the View Invitations page.
Edit
Select Edit Invitation to open the Create Invitation - Vendor Info page.
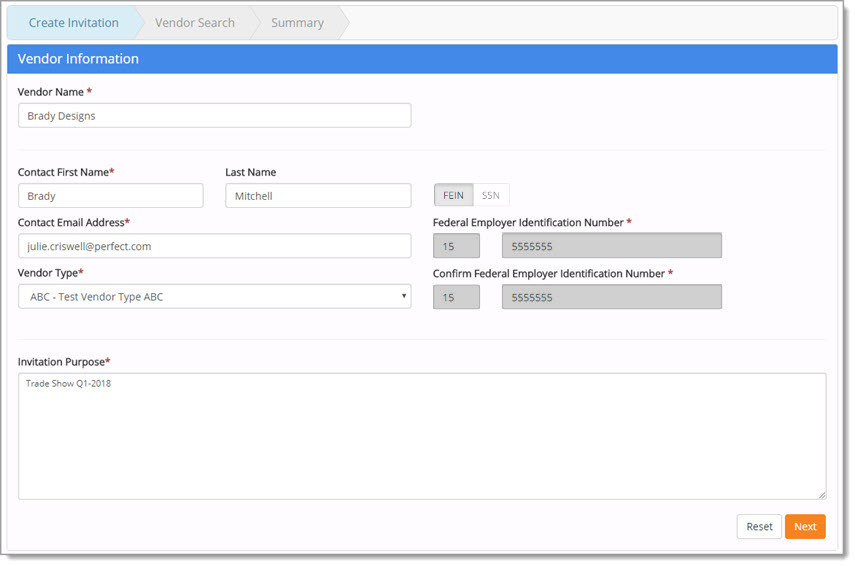
Every field on the Vendor Information page may be edited EXCEPT for Federal Employer Identification Number and Social Security Number.
Make the necessary edits to the invitation.
Reset removes any changes that were made.
Click Next to proceed to the Vendor Search step.
IMPORTANT: When editing Vendor Invitations, note the following:
-
Changes to Vendor Name, Contact Name and Contact Email will update values displayed on Supplier Profile.
-
Changes made to Vendor Type will launch the appropriate Vendor Workflow.
Vendor Search
Matching Vendor Found in System
If the vendor is found in the system, you will not be able to proceed with invitation request.
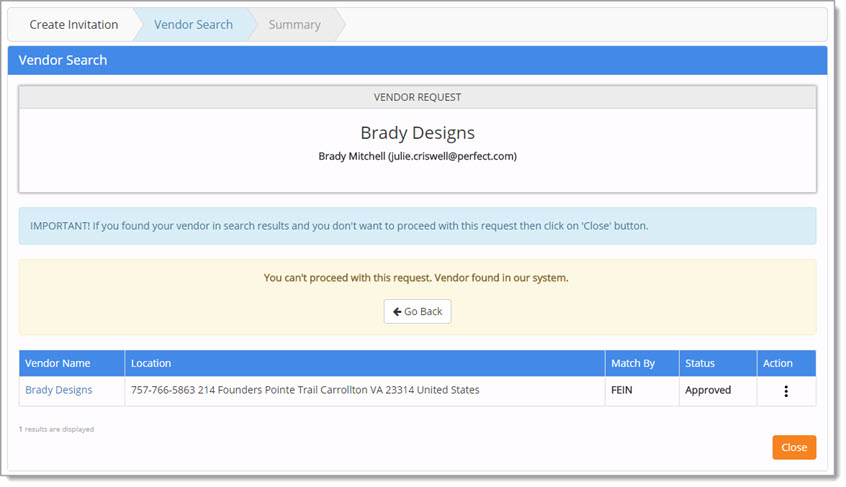
Click Go Back to return to the Vendor Information page and change the previously entered information.
Click Close to exit out of the invitation edit/creation process.
The following confirmation message opens:

Click OK to proceed with closing the invitation.
Cancel ends the closure process and you will remain on the Vendor Search page.
Vendor Profile
There are two ways to view the vendor's profile from this page.
The first is to click the hyper-linked Vendor Name and the second way is to select the View Profile ![]() icon from the Action column.
icon from the Action column.
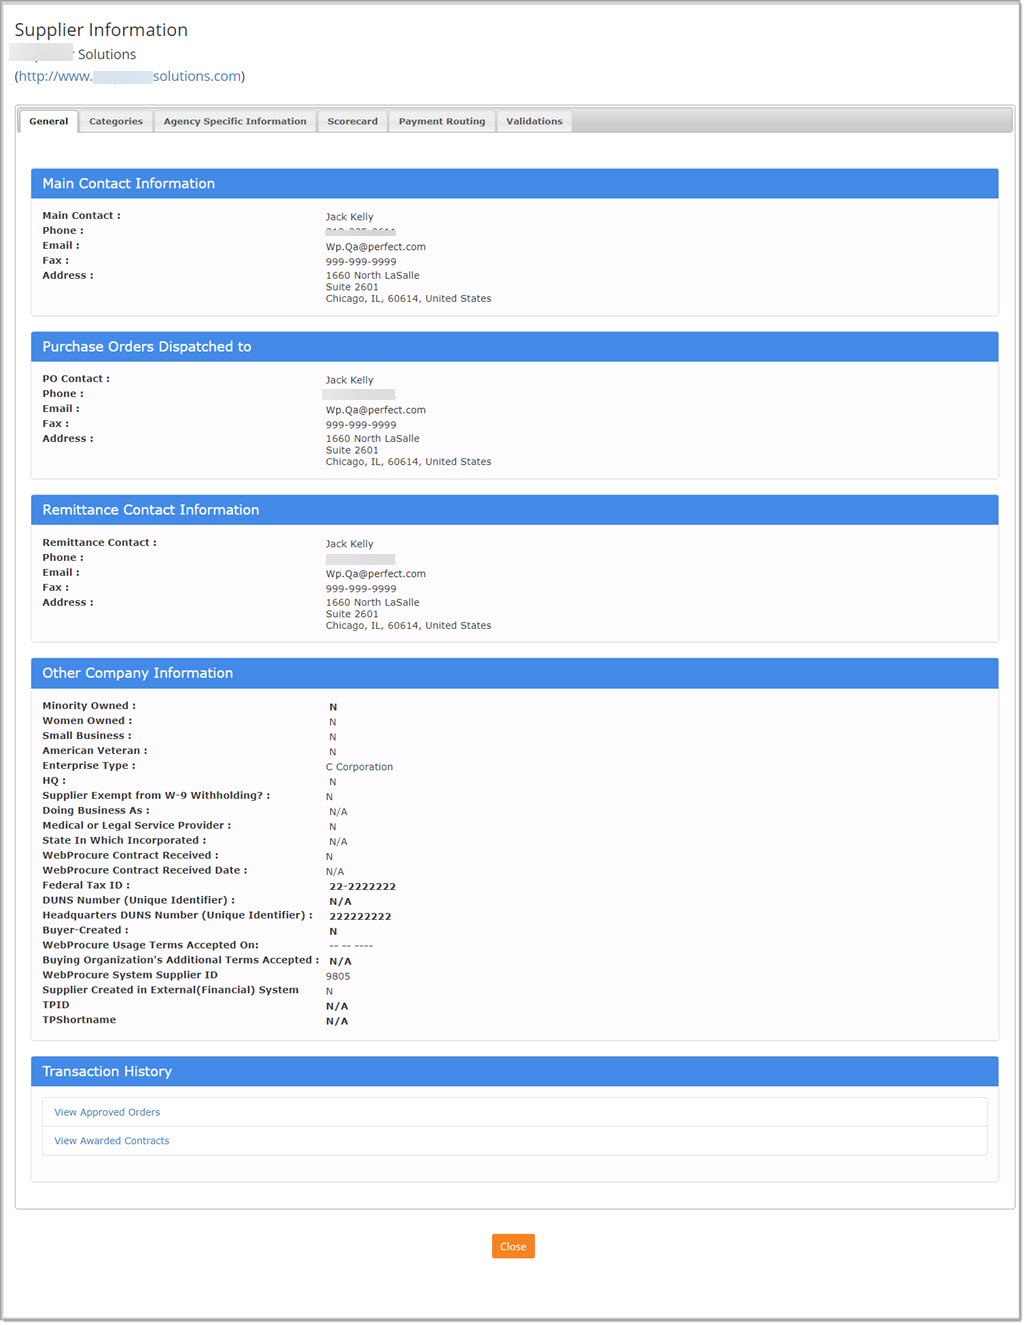
Regardless of which method you choose, the vendor profile will open in a modal window.
See example image below:
Add Vendor from Listing
If the Vendor Search finds a vendor that has not yet been added and you would like to send this invitation to them, click the Add Vendor ![]() icon
from the Action column.
icon
from the Action column.
The following confirmation message displays:

Select Yes to proceed with creating an invitation for this chosen vendor.
Select No if you do not wish to proceed with creating an invitation for the chosen vendor.
If you select Yes, the Create Invitation window displays.
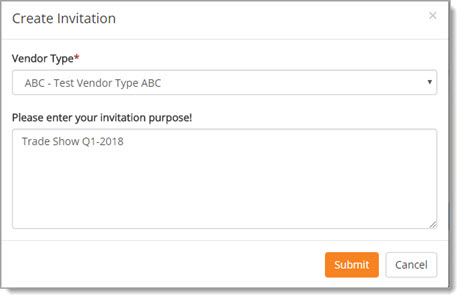
This window displays the selected Vendor Type and the invitation purpose you entered.
Change the Vendor Type, if needed.
Change the invitation purpose, if needed.
Click Submit to submit the invitation into the workflow.
Cancel returns you to the Vendor Search page without submitting the invitation.
Submit Invitation
After selecting the Edit Invitation ![]() icon from the Action column of an invitation in Draft status, the invitation opens to the Summary page.
icon from the Action column of an invitation in Draft status, the invitation opens to the Summary page.

The options on this page include:
-
Edit Invitation - Opens the invitation in full edit mode.
-
Submit Invitation - If the invitation is accurate and ready to be submitted as is.
-
Close - Select this option to close the invitation and return to the View Invitations page.
If the invitation is accurate and ready to be sent, click Submit Invitation.
The system will display that status of creating the invitation.

When the process is finished, the following completion message will display:

This message indicates that the vendor invitation request has been submitted successfully into workflow.
Select Create New Invitation to open a brand new invitation in create mode.
Visit the Create Invitation topic for details on creating a new invitation.
Click Close to return to the invitation Vendor Invitations listing page.
The status of the invitation will be changed to
Draft Revision.